Intelligent Chroma Subsampling
In this post we will talk about chroma subsampling and how it can be used to make your images load faster if done right. Chroma subsampling is a pretty old technique and has been used in numerous contexts like television colour systems like NTSC, etc. but in this post we are only going to be focussing on how it applies to images on the web.
Chroma subsampling is used in lossy formats like JPEG and WebP to reduce image sizes by discarding some of the colour information in the images. If done right, the user should not see any difference in the quality of the image after chroma subsampling is done.
Why does it work
The main reason why chroma subsampling works is because the human eye is more sensitive to brightness than colours. Our eyes have two kinds of photoreceptors - rods and cones. Rods are more receptive to brightness and cones are important in detecting colours, and we have 120 million rod cells and 6 million cone cells. It’s no wonder we are more sensitive to changes in brightness than changes in colour.
To exploit this fact, formats like JPEG use the YCbCr colour scheme. Instead of representing colours using R, G and B, they convert it to Y (luminance / brightness), Cb (blue) and Cr (red). Each colour can be converted from the RGB colour space to the YCbCr colour space with a simple mathematical formula. The advantage of separating out the brightness and colours into separate channels is that they can be compressed in different ways. Chroma subsampling works by keeping the brightness channel intact but by discarding some information in the chroma (colour) channel.
For example, consider an image split into its individual Y, Cb and Cr components. The maximum amount of detail is in the brightness (Y) channel. The Cb and Cr channels add more details to the overall image, but do not contribute as much as the Y channel. This is the fact that chroma subsampling exploits, leading to smaller images.
There are different modes of Chroma subsampling depending on how much information is discarded. The most commonly used setting is 4:2:0 which results in approximately 17% smaller image sizes. Images with the subsampling setting as 4:4:4 have essentially disabled chroma subsampling.
“Be right back.. I will subsample all my images to 4:2:0”
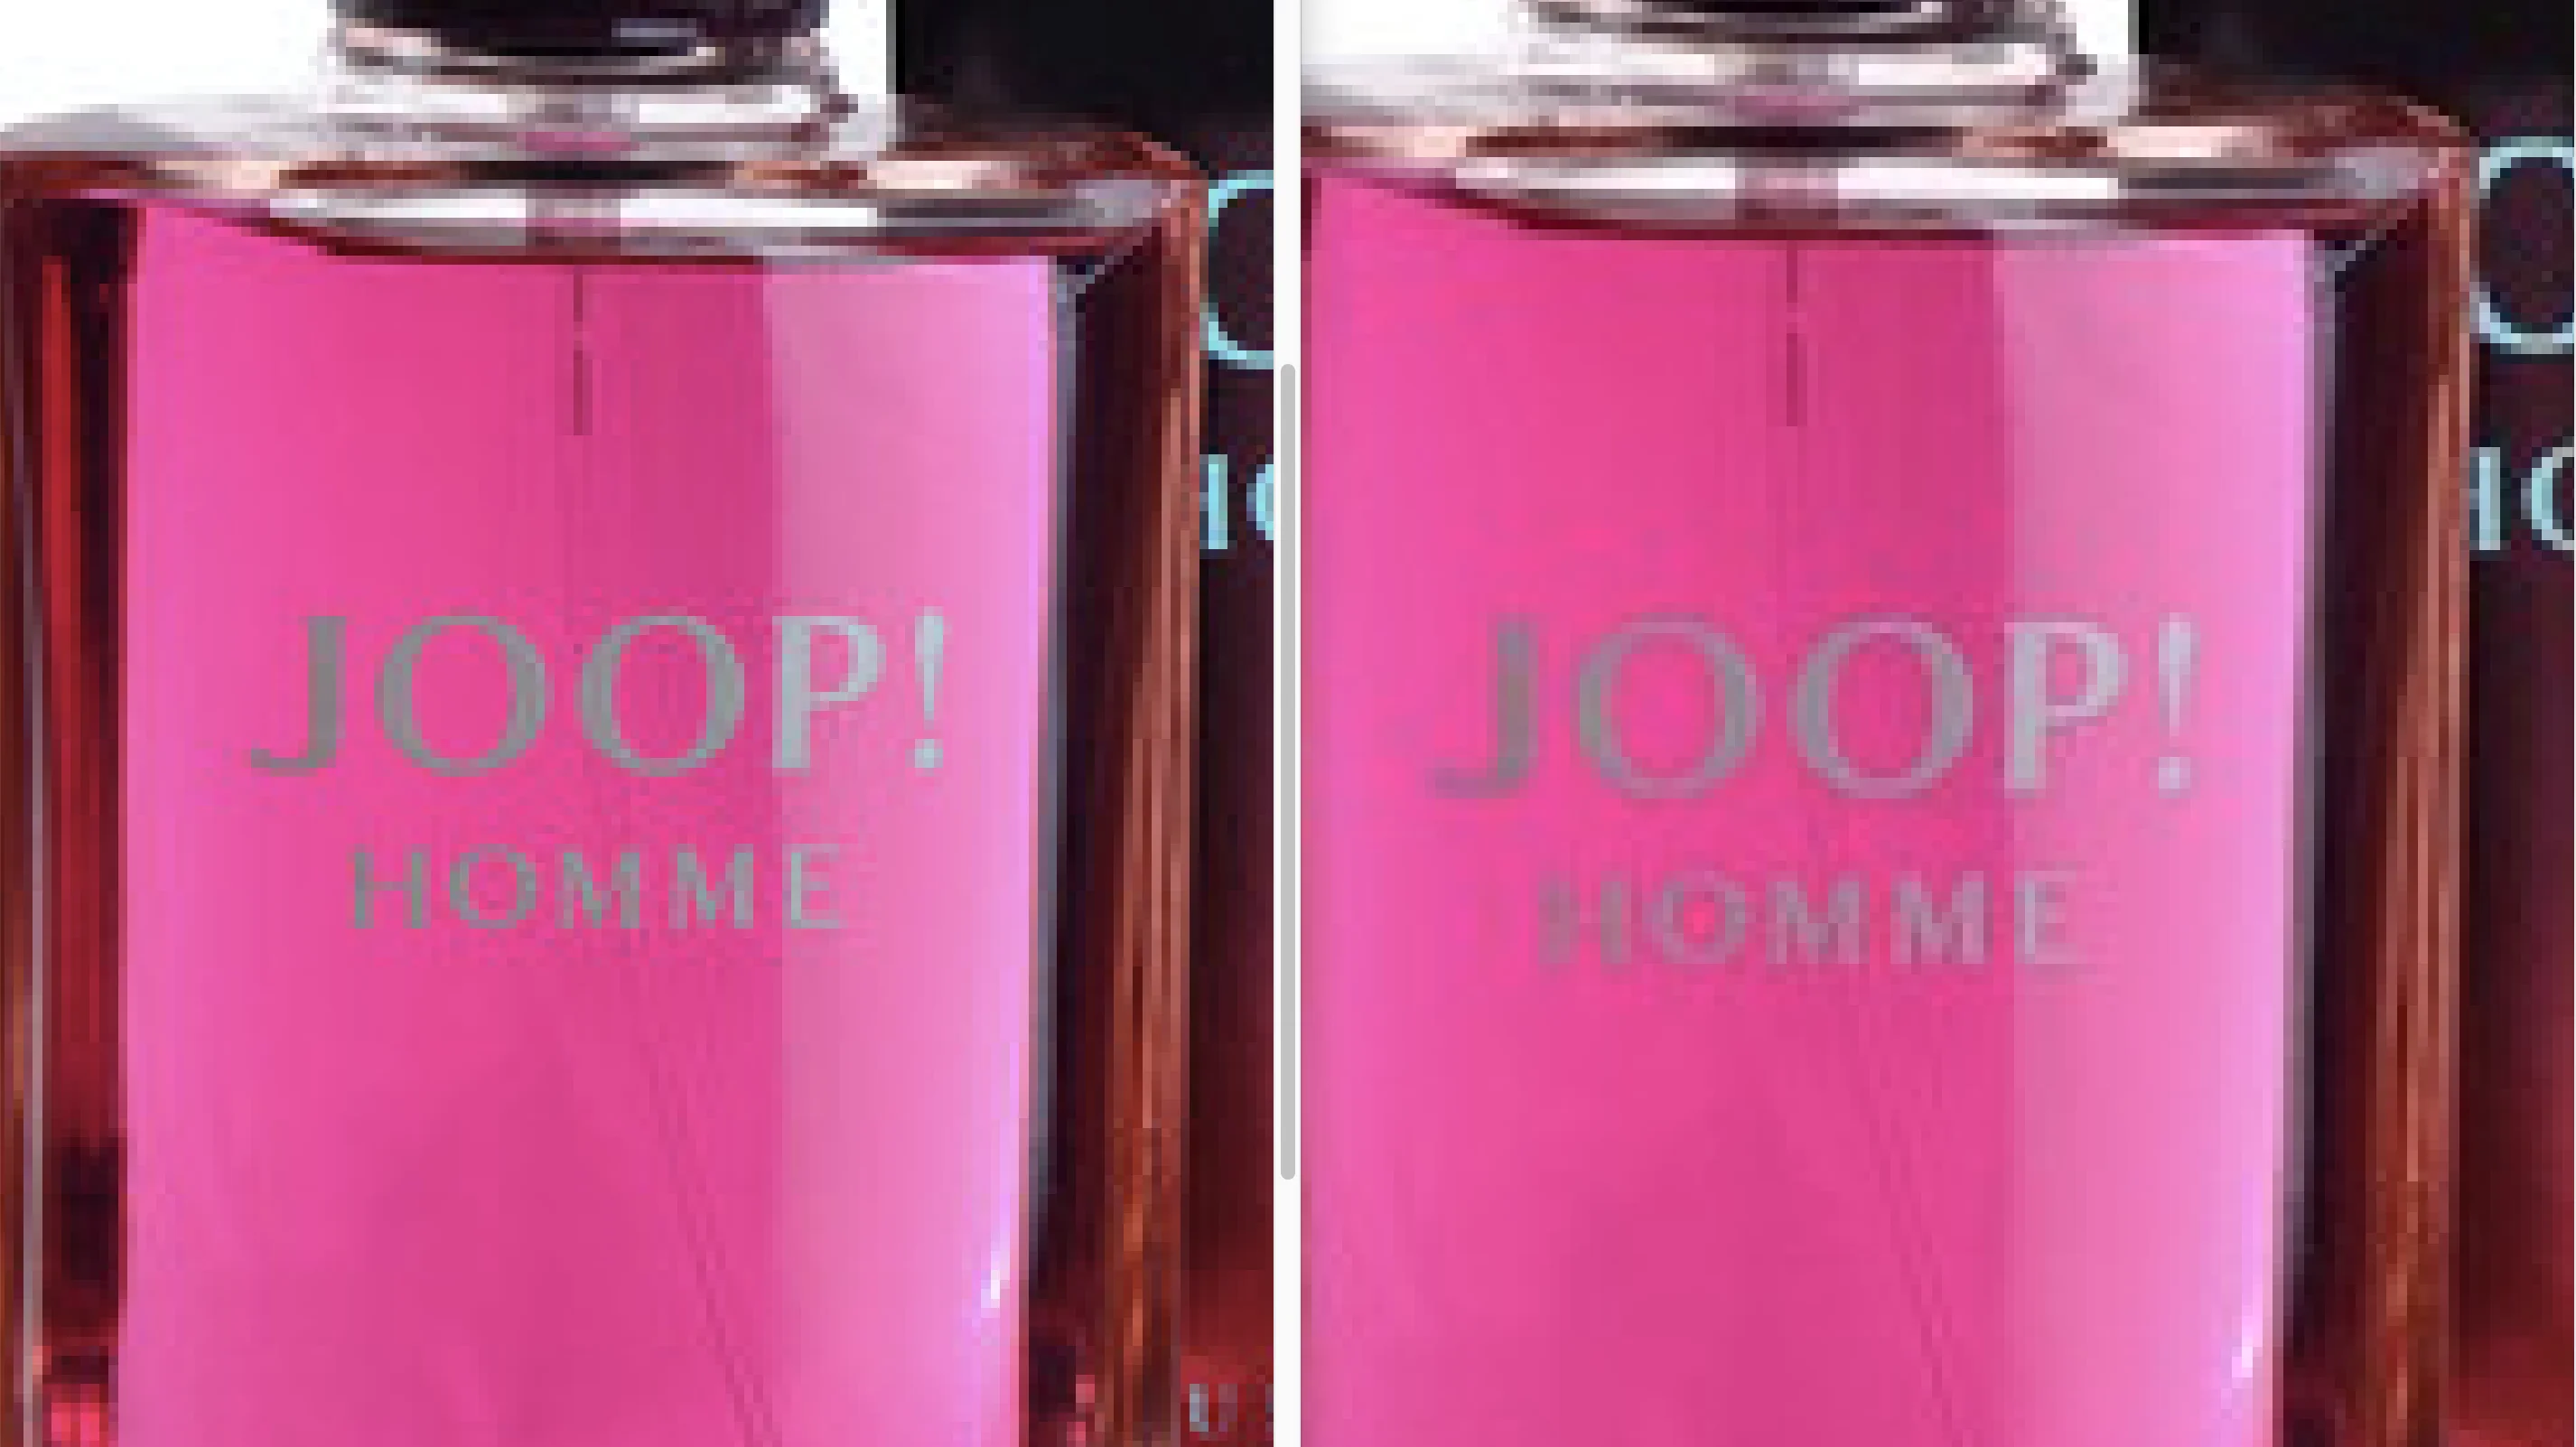
Hey hang on! Even though 4:2:0 is a good starting point, subsampling fails in certain kinds of images. Chroma subsampling is great for photos, where there are usually no sharp edges and there is usually a smoother graduation in colour. However certain kinds of images like images which have text in them, screenshots, drawings, medical images, etc. do poorly when chroma subsampling is enabled. These kind of images are better off when encoded in a lossless format like PNG, or if they are in a lossy format like JPEG, make sure subsampling is disabled for them. Some formats like WebP do not have a configurable chroma subsampling level. For WebP, it is always 4:2:0, so there is no way to disable chroma subsampling when encoding in that format.
A good test is to compare the same image encoded three ways: the original, with chroma subsampling disabled (4:4:4), and with 4:2:0 subsampling. For natural photos the difference is barely perceptible. For images with sharp colour edges like text or screenshots, the 4:2:0 version shows visible artifacts.
Dexecure’s Intelligent Chroma Subsampling
Dexecure uses machine learning algorithms to automatically figure out if the image belongs to a category which is not well suited to chroma subsampling. In those cases, subsampling is automatically disabled for lossy formats, automatic format conversion to formats like WebP is disabled, and a different set of optimisations are applied to these images. Images are automatically categorised behind the scenes and the right quality, size, subsampling levels, formats, etc. are chosen automatically.